MS Word is one of those applications that is a household name and known to almost everyone. Whether you are a computer expert or a total novice, the chances are that you have used MS Word. However, while we are all familiar with MS Word, not all of us are familiar with all the features that lie hidden away inside its many tabs and settings. This means that you are actually not making use of this very powerful and helpful tool to its full potential. So here are some cool features (based on MS Word in the Office 365 package) that should really help you out write a better document, be it a small letter, a report or even a massive Doctoral thesis.
A very useful feature in MS Word is the “Format Painter” tool (the one that looks like a little paint brush). With this you can copy all the formatting applied to a certain bit of text and apply it to a different section of the document. However, the only problem with this is when you want to apply a format to several different sections of the document. In this case, you have to keep selecting the formatting style to use repeatedly by pressing the “Format Painter” button again and again and highlighting the text where you want to apply the format to.

There is however a keyboard shortcut of MS Word that can help you out in these situations. By using the Ctrl + Shift + C keys to copy the format of the text where the cursor is at and then using the keys Ctrl + Shift + V to apply the format to a selected area of text. You can then keep repeating the keys Ctrl + Shift + V to apply the format to different areas without having to copy the source format repeatedly.
One thing that can be quite a hassle is either forgetting that you had some content copied and then accidently copying over it. Or the other challenge that can come up is that you have different content to be copied and pasted in different places. This will mean that you have to either switch between the places where the content is available and where its’ needed or store the content to copy in some other document.
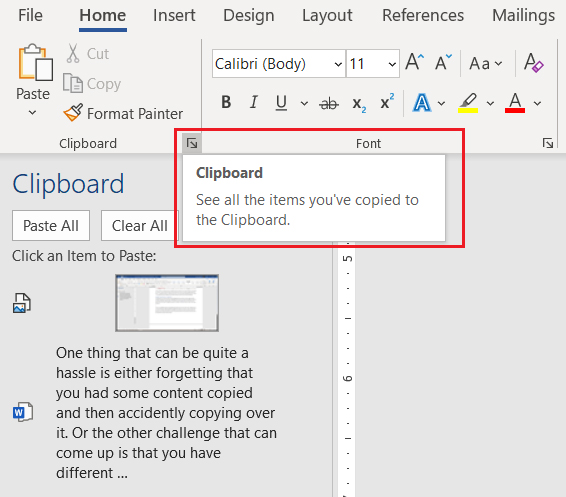
This is not a challenge anymore. By pressing the drop-down arrow in the “Home” tab’s “Clipboard” you can access MS Word’s clipboard. MS Word’s clipboard can hold up to 24 items at a time, and each time you “Copy” something, it gets added to the clipboard. Then when you want you use this content, just place the cursor where you want the content to be pasted and then from the drop down button next to the copied item, press the “Paste” button.
Using the styles in MS Word is a very useful feature when you are making a formal document. Among their many benefits is that using styles means that your document’s format throughout is consistent. In addition to this, if you need to make a change to the style, you simply right click on the style and press the “Modify” button. This way, all areas where the style has been applied to will be modified at once. For example, if you wanted to change the main content of the document from a font size of 12 to 11, then all you have to do is simply modify the style.
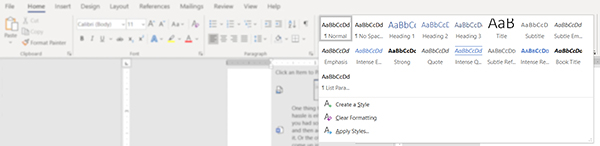
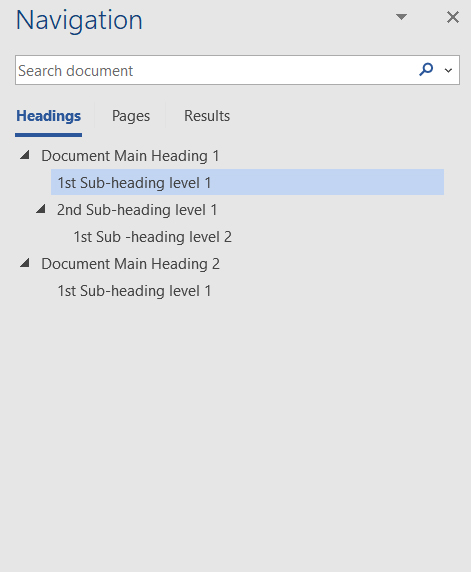
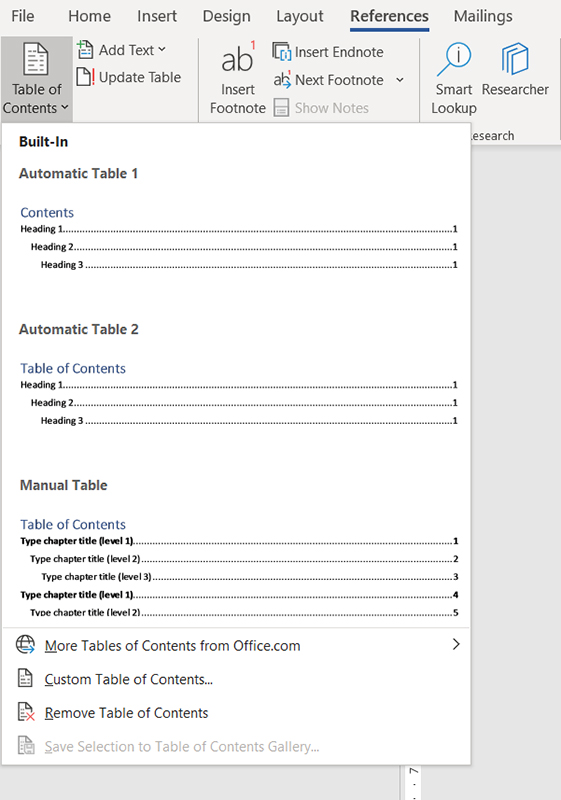
This section also offers you different heading styles. Word offers multiple levels of heading levels and you can customize this according to your document’s need. This way, each level title throughout the document will be the same format. In addition to this, the headings will show in the “Navigations” pane in the MS Word which helps you easily navigate to different sections of the document. A cool additional benefit is that when you want to add a “Table of Content” to your document, simply go to the “References” tab and select a table of content style from the “Table of Contents” drop down option. MS Word will then automatically create the Table of Content based on your headings.
You can also use these titles to easily rearrange sections inside the document. Simply drag and drop the titles as needed in the “Navigation” pane and the content under that title will also be moved with it.
Like how you can manage your document’s layout by moving titles around, you can edit the document’s layout with much more in-depth capabilities by using the “Outline” feature found in the “View” tab.

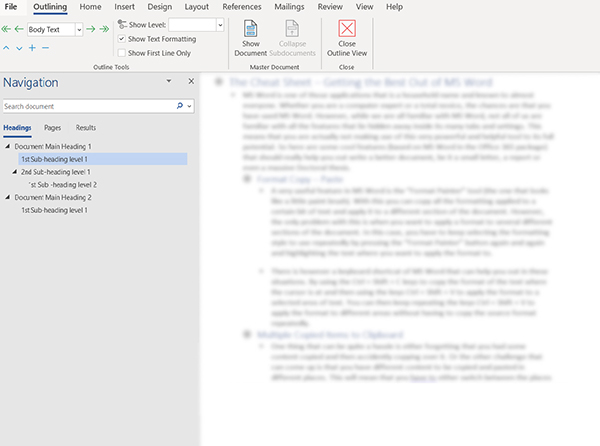
When you select this, Word automatically shows a breakdown of the document based on the content inside. With this, you can re-order and fix the layout of the document with ease and all with a clear summary outline of your entire document. With this feature you can even remove sections if you feel it’s unwanted.
When writing a formal document, like a thesis, it is quite important that you use the proper citations and make sure you put the proper references in the proper style to avoid being seriously penalized for misquoting or misciting some content of the document. One way that most people deal with this us by using the different tools available online (like www.citethisforme.com) or in the worst case, manually citing and adding the references.
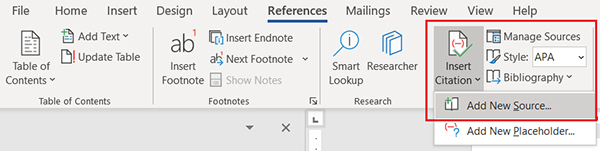
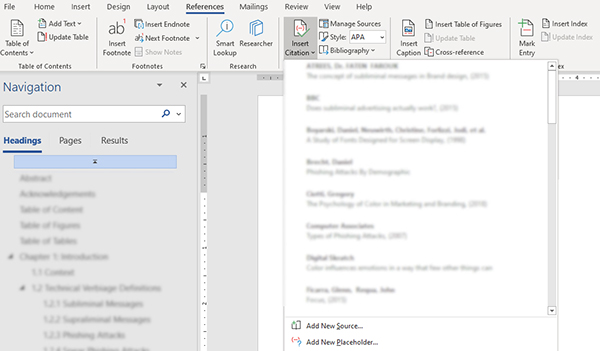
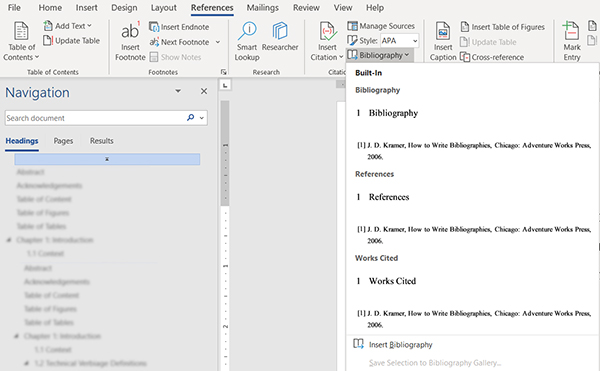
MS Word takes away this hassle by having an inbuilt citation tool that lets you effectively manage all your citations within Word itself. This powerful tool has several commonly used citations styles like APA, Harvard – Anglia or IPA. Simply pick a style and press the “Insert Citation” button and select “Add New Source”. When you do this, a form opens showing the required fields that you need to enter. Fill this out and the in-text citation will be added in the format expected by the selected style. All the citations used in the document are stored as well, so you can repeatedly use different citations wherever needed. On top of this, at the end of the document, you can simply press the “Bibliography” dropdown button in the “Reference” tab and have the references section of the document automatically created. Again, this section will be created in keeping with the proper formatting needed according to the style you selected.
When it comes to different bar charts, pie charts or flow charts the normal process was to add the data in an MS Excel sheet and generate the graph through that option. However, this additional step is no longer needed. MS Word now comes with the ability to generate its own graphs and charts with a few simple button clicks. In addition to that, it is even possible to use existing tables inside the word document to create the graphs and charts.
Simply navigate to the “Insert” tab and in the “Object” dropdown, select the “Object” item. In the form that opens, select the “Create New” tab, and scroll down to “Microsoft Graph Chart” option. This will open an editor for the graph where you can define or select the needed data and pick the kind of chart you would like created.
When working on large projects, resource sharing is a common and often done practice. However, the problem of resource sharing is that it can be difficult or cumbersome to track all the places where changes are done on a single document when different people work on it.

MS Word solves this problem with its “Track Changes” and “Comments” options in the “Review” tab of MS Word. With this feature turned On, all the changes made by any person is tracked and clearly identified. These changes remain until someone checking or editing the document right clicks and presses “Accept” or “Reject” to determine whether to allow the changes to the document or whether to reject them.
Another way to communicate some changes to a document is through the use of “Comments”. Simply highlight the piece of text that you want to comment on and then Right Click and select “Add New Comment”. All these comments will go with the username of the person making the comment so that you are clear on who asked what. In addition to this when multiple back-and-forth discussions on a document happen, you can “Reply” to a comment, if you need more clarifications, or “Resolve” a comment to show that the comment has been addressed.
If you are better at saying what you need written down as opposed to typing it out, then the “Dictate” functionality is for you. With this inbuilt feature, you can easily dictate what you want typed out. The only downside to this is that there are only a few languages that work, and Sinhala or Tamil are not yet listed. However, on trying it out the English dictation capability is quite good, though I recommend speaking slowly and clearly since our accent is not what word is familiar with.

To use, simply press the “Dictate” option in the “Home” tab and when you see the little red record button appear on the icon, simply read out what you want entered in the document. Press the button again to stop this functionality.
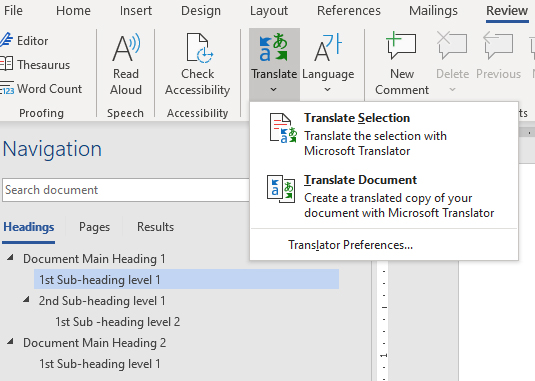
Normally, for me at least, the moment I needed some text translated, I would go to Google Translate to have text translated. MS Word in Office 365 now has this ability, albeit for only a limited set of languages, inside word itself.
Simply go the “Review” tab and select the “Translate” option. Here you get the option to translate the entire document or selected portions of the document. Again, since this feature isn’t as tried and tested as Google’s translate feature, the languages available are limited. However, Tamil is available, but Sinhala is yet to be added.
Microsoft probably realized that a lot of us have to spend a lot of time on other apps editing pictures before we add them to our word document. Word however is stepping up and now offers quite a few powerful picture editing options within Word itself.
Some of these features, like the “Remove Background” are features that most standard picture editing software doesn’t even have. In addition to this, some of the editing capabilities, like changing the brightness and contrast in Word, seem to outperform other basic apps. You can also add different pictures on top of each other and edit their transparency to make some basic yet cool photos yourself.
You can also Crop, rotate, and perform several other features. To use it, simply click on the picture and navigate to the “Picture Format” tab.

Once you are all done with your document, one thing that we all usually do is to press the “F7” function key or the “Editor” to make sure our document’s grammar and spellings are all ok. Office 365’s Word package however goes several few steps further than this. It offers suggestions on how to refine your document. These aren’t errors but tips on how to improve the quality of the document. Often shown with a blue or brown dotted line beneath the word or sentence. This is especially useful to help build a much more professional document.
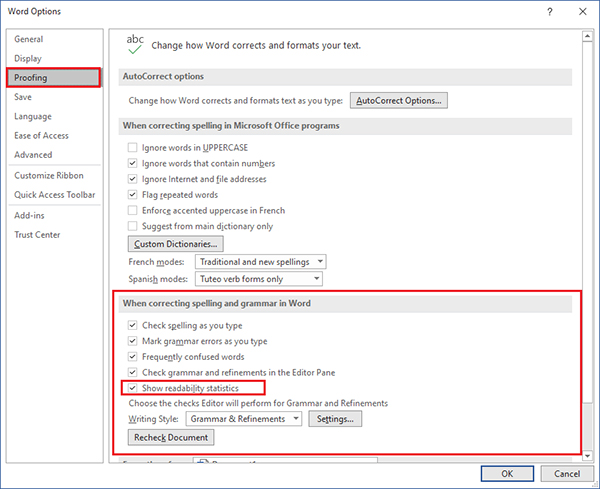
Word however takes this a step further and rates your whole document as well based on its readability. To access this option, you must enable “Show Readability Statistics”. This setting can be turned on/off by going to “File” -> “Options” -> “Proofing” and then selecting the checkbox, “Show Readability Statistics”, under the “When checking spelling and grammar in Word” section. With this enabled, the readability statistic will show after you press the “F7” function to validate the document. However, you should have reviewed the other corrections and refinements suggested by Word and either make those changes or “Ignore” the suggestions.
Once you have addressed all these corrections or refinements, a popup will show with statistics on the document such as word count and a paragraph count. At the bottom of this form you can see three key statistics. These are the “Flesch Reading Ease” metrics, the “Flesch-Kincaid Grade Level” metrics and “Passive Sentences” metrics. Microsoft support tells us what scores we should ideally aim to hit in our document.
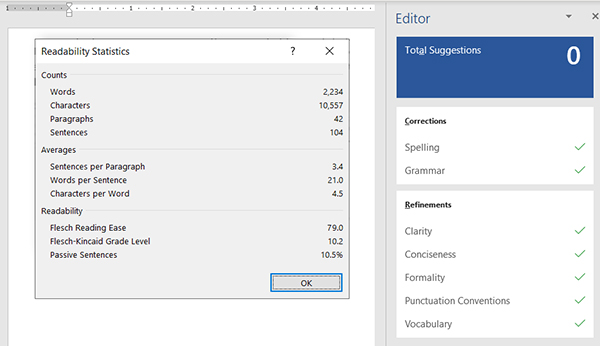
For the “Flesch Reading Ease” metrics, we get a rating from 1 to a 100 where the higher the score, the easier the document is to read. Ideally you should aim for a score between 60 and 70. The “Flesch-Kincaid Grade Level” metrics tells us what U.S. school grade level reading our document falls within. So, if the value shows 7, that means someone in grade 7 would be able to understand your document. For most documents, Microsoft recommends a score between 7.0 and 8.0.
Finally, we have the “Passive Sentences” metrics which shows how many passive sentences we have as a percentage of the whole document. According to professional writers we should aim to keep this value below 10%, which would indicate that we have more “Active Sentences”.
With these statistics we can aim to create a much more professional and readable document. Hopefully helping you get a much higher grade in your work and greatly improve your writing skills.